Making a transcript of your favourite TV series
Requirements:
- VisualSubSync installed.
- An avi file you want to make a subtitle for.
1) Creating the project
Here we go, let's start VisualSubSync and choose in the menu File>New Project…
I use the little browse button (1) to select my video. Once it's done I get this screen:
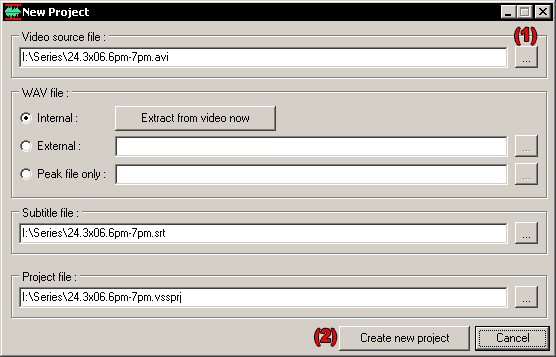
For the WAV file I keep Internal checked so the WAV will be extracted at the next step.
The 2 last fields (Subtitle file and project file) are automatically pre-filled, I keep them like that.
Now I click the Create new project button (2), and I get to the Extract WAV dialog below:
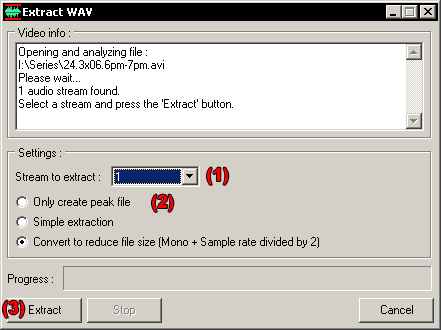
If our video file as several audio stream we can select one in the Stream to extract combo box (1).
For the WAV extraction we have 3 different choices (2).
In the 3 cases a peak file will be created. A peak file contain a highly reduced resolution version of the WAV file, which is used to display the audio form. Using the WAV file directly will be too slow, it will require to process a too large amount of data.
If you choose Only create peak file the video file will be used for audio preview so no more space will be required on your HD, but it's less efficient for audio preview, you will have a little start delay for example.
The Simple extraction option will just decompress the audio stream without any modification, so it can create quite big files.
I advise to use the last option Convert to reduce file size, it will create a WAV in a little reduced resolution but keeping enough quality to have a still comfortable listening.
Ok, now we are set, I now click the Extract button (3) and we just have to wait now, extraction will take 2-3 minutes.
2) The main window
Finally we are ready to start the real work, this is the main window:
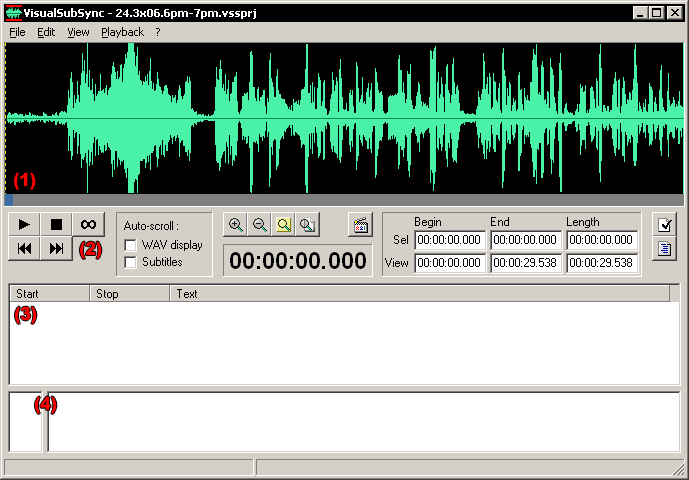
The interface can be divided in 4 different parts:
(1) the WAV display
(2) controls for listening, and information about WAV display
(3) the subtitle list
(4) the subtitle edition, with the number of characters by line in the left part and the subtitle text in the right part
An important thing to remember is the shortcut used to control the WAV display part:
- Zoom-in/out centered on mouse cursor position: mouse wheel up/down.
- Left/right panning: middle button mouse press + mouse left/right.
- Faster left/right panning: shift key + middle button mouse press + mouse left/right.
- Selection: mouse left click.
- Expanding selection : shift key + mouse left click.
3) Adding subtitles
Ok, let's add a subtitle now.
First, I zoom a bit using mouse wheel up and go to start of the audio stream using the little grey scrollbar, then I start playing using the play button or F1. I select a part of the WAV display using mouse left click and to check that I have the right part I press F1 again to listen to the audio. I readjust the selection keeping the shift key pressed and left clicking in the WAV display part. Once I'm satisfied I right click in the WAV display part and select Add subtitles (1).
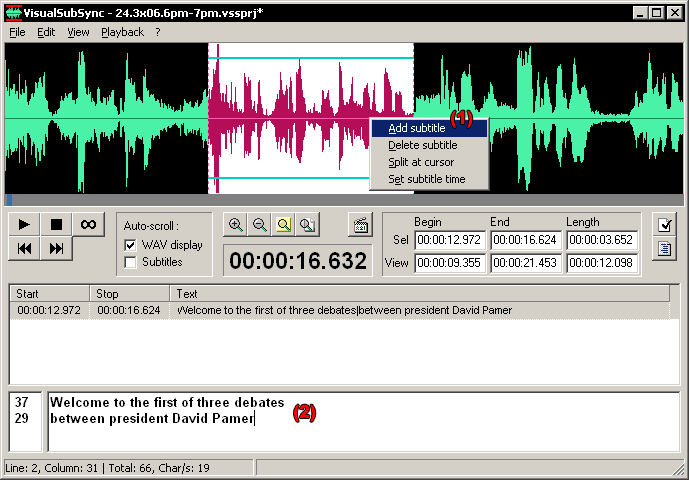
The focus is now set in the subtitle edition part, so I enter the text for this subtitle (2).
You can notice some little statistics in the status bar, like the position of the cursor, the total number of characters and the number of characters by seconds which is usefull to check if your subtitle has a long enough display time (between 15-20 Char/s seems good).
If I don't understand some words I just put some ??? you will see later why.
4) Error checking
Some time later…. Ouff I've finished typing all the text.
Lets's use the error checking function now, it's available from the menu Edit>Error checking>Check errors.
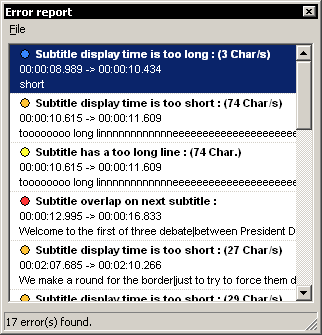
Different types of error are reported, 4 at the moment:
- Overlapping : An error is detected when the subtitle overlap on next subtitle.
- Too short display time : An error is detected when the number of Char/s is strictly superior to a specified value.
- Too long display time : An error is detected when the number of Char/s is strictly inferior to a specified value.
- Too long line : An error is detected when the line length in a subtitle is strictly superior to a specified value.
You can configure this in the preferences. Edit>Preferences…
Double clicking on a line will place you on the subtitle with the error.
When most of the error are corrected we should have pretty good subtitles.
5) Network mode
Now a special feature for people who's native language is different from the original video. (like me ![]() )
)
VisualSubSync include a little network mode. To enable it select the menu Edit>Webserver>Start.
Give your ip address to your friend, or your domain name if you have one, and they will be able to help you by using any web browser. They just have to enter http://your-ip-address or http://your-domain-name in their browser.
You can of course configure the port used in case you already have a web server by going in Edit>Preferences…
Then to check if it works or see how it looks you can use locally http://127.0.0.1
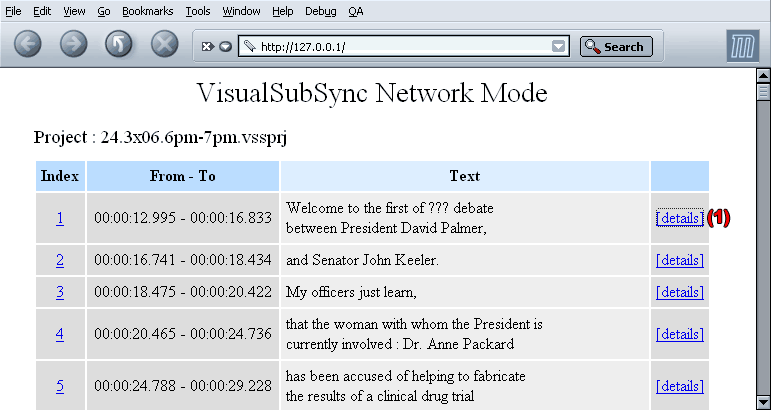
Clicking on [details] open the following page:
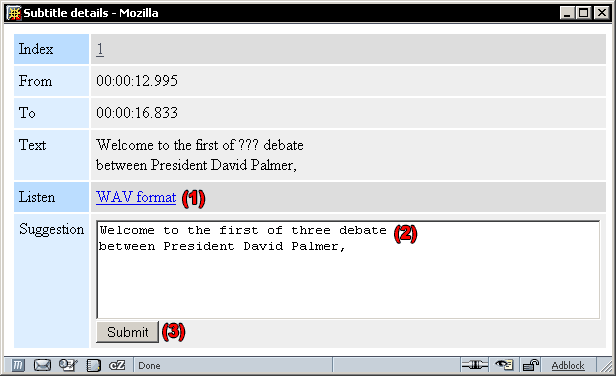
Here you can listen to the subtitle audio (1), complete the words missing (2), and finally submit your suggestion (3).
In return you get the suggestion in VisualSubSync by using Edit>Web server>Show suggestions :
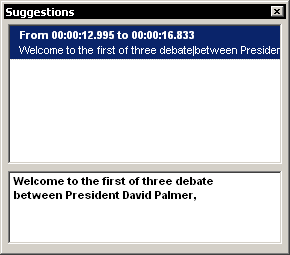
You can correct the text of your subtitle, and your friend will see the text modification instantly by refreshing his browser.
